ENTER SEARCH KEYWORD
Q: What information should I provide if an error occurs on the AP200/HT200 code reader?
- Serial number of the device
- Your phone details (brand, model, software version, etc)
- Screenshots or video of the error on the device
If you need to transfer your software, please contact tech support and provide the following:
- Old and New serial number
- Reason of software transfer
Q: Why am I unable to use Paypal or Apple Pay to purchase software/updates directly?
Please contact the dealer you purchased the device from to purchase software/updates directly
Q: Why am I receiving an "Install Failed" error when attempting to download software?
Android: Long hold the app icon, go to app info > storage > Clear cache and try the download again
iOS: Go to Me > Settings > Clear Cache and try the download again
Q: I failed to purchase the software/update, but I received the message "The product has been moved"
Please contact tech support and provide a screenshot of the message received
Q: Why am I receiving an "Acquire Failed" error when I try to log in?
Check if you are able to see "Log in Later" at the bottom right corner of the login screen. If not, please make sure to download MaxiAP200 to your AP200
Q: Why am I receiving the error message "The vehicle does not support current language"?
Please contact tech support and provide your serial number to change the sales contract to all languages
Logs are collected via MaxiTools when the errors which are most likely related to system program issues occurred. Generally these errors occurred before we get access to internal diagnostic function menu or before we started to diagnose the vehicle. For example, when we tap Diagnostic—Benz, but error message “Authorization Check Failed” came up.
Q: Why am I receiving an error message after factory resetting my device?
Generally this issue occurs after a factory reset attempt on a device that is out of subscription.
Go to ES File Explorer > SD Card > Scan > apk_back
Reinstall MaxiDas.apk
If the apk_back folder is not found on the SD card, please upload the data log via MaxiTools and send the MaxiUI version to tech support
If the device has a valid subscription, flash the device with program which will delete all data; If the device is out of subscription, flash the device with program which will not delete all data first; If the device is still stuck, the risk of using flash program will delete all data and flash the device with the program which will delete all data. Contact tech support for flash program
Please check if your device is in black list. If not, please upload logs via MaxiTools for further details
- Check to see if there is a network issue.
- Check if Autel's server Ips are blocked by your internet provider
- Try to connect the device to another wifi connection or your phone's hot spot
Please go to System Settings-Storage, check if internal space is enough;
Please go to System Settings--About tablet, check if MaxiUI version is too low;
If MaxiUI version is too low, you can use OSupdate apk. file (contact support for this file) to update the system version of the device to higher version first;
If internal space is not enough, please uninstall all software first, then download BMW, Benz, Audi one by one first before you download any other software.
If the space is still not enough, you can purchase a designated TF card and download BMW software into this TF Card
※ Only Sandisk TF card of 16G storage, class 10, 80MB/S is compatible with MaxiSys tools;
※ Only BMW can be downloaded into this TF Card;
If MaxiUI version is normal and internal space is enough, please upload data logs via MaxiTools for checking (refer to E. Upload data logs via MaxiTools).
A) "Error Message “Software is not authorized!”
Issue: Whichever software is tapped, you will see this pop-up window with the error message.
Solution:
Go to ES File Explorer--Scan folder, check if there is file “authorization.txt”;
Go to ES File Explorer--Scan—Vehicle, get access to each vehicle folder, check if the file “authorization.txt” is available;
If the “authorization.txt” file is missing in Scan folder, but exists in all other vehicle folders, please try
connect the tablet to computer via USB cable;
turn on USB storage ;
disconnect USB cable;
tap Diagnostics, select any software to check again.
If the above method is not working, you need to renew subscription and download all software again.
B) “Authorization Check Failed! Error Code: 1”
Issue 1:The error message above camp up when you tap specific software, for example, Mini, on the Diagnostic menu;
Solution:
Go to ES File Explorer—Scan—Vehicle, access to the corresponding vehicle folder, for example, Mini, check if the file”authorization.txt” is available there?
If not, please copy an “authorization.txt” file from vehicle folders, BMW, Rolls-Royce and AstonMartin (they must be from the same software pack when you download them) to Mini folder;
*Note:
BMW, Mini, Rolls-Royce and Aston Martin software are from the same software pack when we downloaded them in Update list;
“authorization.txt” file from other vehicle folders rather than BMW, Rolls-Royce and Aston Martin will not be working;
Check if Mini software is back to normal?
If still not working, you need to renew subscription and download the software again.
Issue 2:The error message above camp up when you tap whichever software on the Diagnostic menu
Solution:
Go to ES File Explorer—Scan—Vehicle, access to the corresponding vehicle folders, check if the file “authorizatuion.txt” is available in each folder?
If not, the only solution is to renew subscription and download all software again.
C) “Authorization Check Failed! Error Code: 2”
Issue 1: "Authorization Check Failed! Error Code: 2” indicates Serial Number and Register Password are not matched.
If the device is still in valid subscription,
Go to MaxiSys-Data manager-Apps Uninstall to uninstall all apps;
Run Update and download them back again.
If the device is out of subscription,
Please go to Settings—About, send the screenshot this page to our tech support to show them Serial Number and Register password of your device;
Collect Logs via MaxiTools and upload.
Issue 2: If you saw Error code 2: Serial or password is incorrect, and when you went to About section but found your serial number becameV09G00000131and register password became056947, please follow the below steps:
Turn this tool OFF and wait for 2 minutes, then turn it ON again;
Repeat the above steps for 5 times (at least) and check the serial number on About page again;
If it still shows S/N V09G00000131 and password 056947, contact the selling dealer for repairs.
D) “Authorization Check Failed! Error Code: 3”
Upload data log via MaxiTools;
Send S/N of your device to tech support for help
E) “Authorization Check Failed! Error Code: 4”
Upload data log via MaxiTools;
Send S/N of your device to tech support for help
F) “Authorization Check Failed! Error Code: 5”
Upload data log via MaxiTools;
Send S/N of your device to tech support for help
G) “Authorization Check Failed! Error Code: 8”
Upload data log via MaxiTools;
Send S/N of your device to tech support for help
H) “Authorization Check Failed! Error Code: 9”
Upload data log via MaxiTools;
Send S/N of your device to tech support for help
i) “Authorization Check Failed! Error Code: 10”
Upload data log via MaxiTools;
Send S/N of your device to tech support for help
Q: What should I do if the subscription on my device runs out?
Send us a screenshot of the error message you received
What were you doing on the device prior to the error message popping up
Upload the corresponding data logs via Maxi Tools in this way:
• Reproduce this issue on your device;
• After the same error occurred, go back to Home page;
• Run MaxiTools, click on Start to collect logs;
• After logs are collected, click on Upload;
• Make sure you saw “Upload completed”.
Connect the device to wifi, click on Authorization button to finish authorization;
Or Uninstall software or erase SD card, then download software again to have the issues resolved.
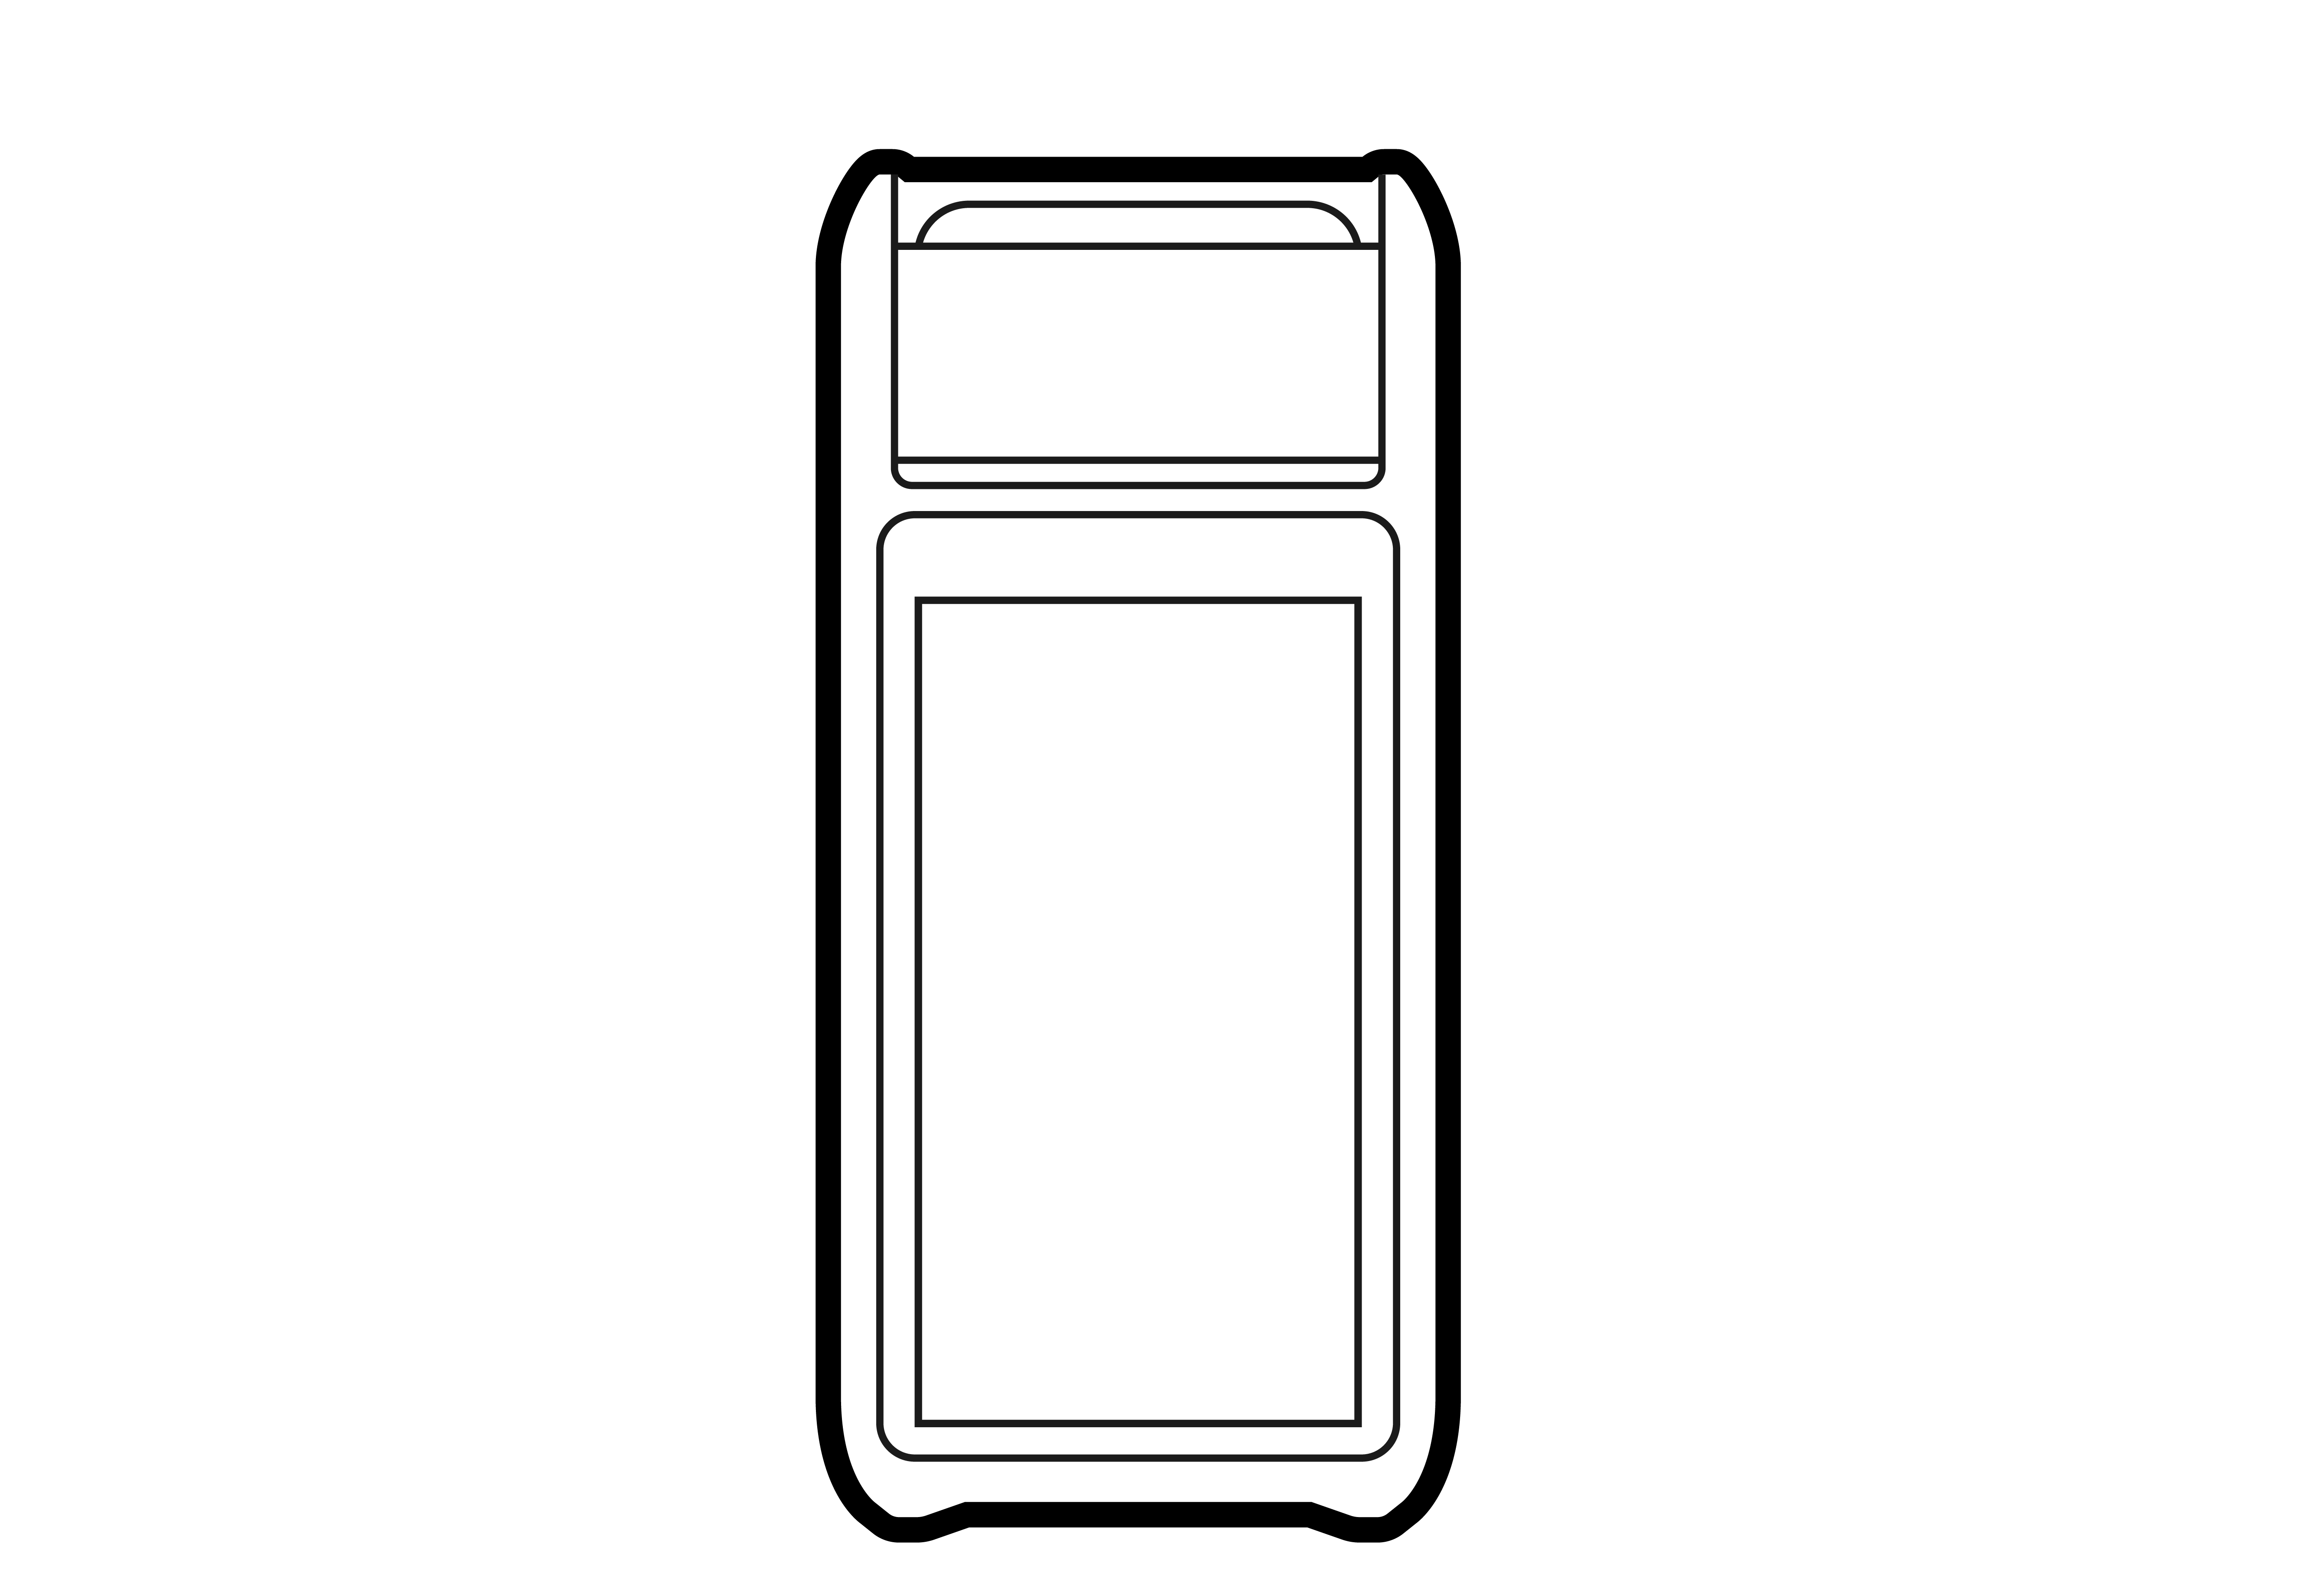
Q: How can I collect and upload data logs using the AP200/HT200?
- You should click the icon (shown in red box at the bottom) to start the log collecting process
- You will see the icon light up after clicked
- If the problem occurred during the diagnostic process, you should click the icon again to end the log collecting process, and then upload
- Please describe the issue in detail when you upload the data logs
After a log is collected, a log file will be automatically created and stored in your device;
You can go to ES File Explorer > Scan > Data logging to find out the corresponding vehicle folder;
You will see log files (generally zip file named by date) that you can emal directly to tech support
Software Issues when using other product models with Data Logging Function:
Q: What should I do when I'm having software issues on my MX/MK, DS808 or MaxiSys tool?
Generally data logs should be collected if you encounter software issues during the diagnostic process below:
- When you are accessing a specific system/all system
- Reading DTCs, clearing DTCs
- Reading or decoding VIN, reading live data
- Performing active tests, special functions or programming/coding, etc
Q: What precautions should I take when I encounter a software issue?
Describe the problems/errors you are encountering in detail
Upload the corresponding data logs (Data log upload instruction: https://youtu.be/kkdSFht6rh4)
Make sure the data logs collected are valid and complete (a valid and complete data log starts from when you entered the diagnosis and ends when the problem you reported occurred
Make sure the data logs collected were uploaded successfully (Tech support can check in a corresponding system)
Provide the serial number of the device to tech support after the data logs are uploaded.
Q: What steps should I take if I encounter a failure to perform a specific function?
Check if all pre-conditions are fully satisfied
Record the diagnostic process in video and send to tech support;
Advise the make, model, year and VIN of the vehicle;
Send the screenshot of About page of your device;
Advise the specific function you were doing;
Advise in details the problems you encountered and what you have done on the vehicle.
Q: Why did I receive a “Linking Error” message when using the OBDII software?
Check if the vehicle being tested is OBDII compliant (EOBD or JOBD is not supported)
Vehicles adopted the OBDII system at different times and in different regions around the world:
- Europe: Adopted OBDII system since 2006
- U.S.A: Adopted OBDII system since 1996
- Asia: Adopted OBDII system since 2009
Check if any other OBDII compliant vehicles (US vehicles, Ford, GM, Chrysler are suggested) are communicating with the scanner or not; If other vehicles are communicating fine, it is most likely that the vehicle you are testing is NOT OBDII compliant
If it is confirmed that the vehicle is OBDII complaint but you are still receiving a linking error, please provide the following details:
- region/country
- screenshot of About information of your device
- VIN of your vehicle to our tech support
Q: Why am I receiving a communication failure with all modules?
Check if the OBDII cable is working. change to another cable to confirm
Check if the OBDII function is communicating properly
Check if there are any issues with the vehicle itself
Check if any other vehicle has the same issue; If all vehicles are not communicating, please try another OBDII cable.
If this is the only vehicle not communicating properly, please check for problems with the vehicle itself
Check if there are any problems, especially connection issues, in this module
Check if there are any related issues/error codes in any other modules; If yes, fx those related errors first
If you are still receiving an error, please record a video of your diagnostic process and provide the details
The TPMS light is lit on the dash of my 2005 vehicle, what should I do?
The tire pressure control module might be faulty. Use an Autel tool with OBDII-connection capability such as the TS508 or TS608 to detect trouble codes within the TPMS module. You may need to repair or replace a part within the system such as a transmitter or receiver.
My vehicle had a collision. Now my TPMS light stays on. What do I do?
The vehicle may have a damaged TPMS module or non-functioning sensors or both. Use an Autel TPMS tool to check the sensors and the control module.
If sensors fail to activate, the sensors need to be replaced. Program Autel’s MX-Sensors to replace sensors. Follow the vehicle manufacturer-specific Relearn procedures displayed on your Autel tool. If the sensors fail to relearn, connect the Autel TPMS to the OBDII port to scan for system faults. You may need to repair or replace a part within the system such as a transmitter or receiver.
I cannot complete the sensor relearn.
Please carefully follow the step-by-step instructions displayed under Relearn Procedure on your Autel tool.
I performed auto relearn and drove the vehicle, but was unsuccessful in relearning IDs.
Drive the vehicle consistently at the speed of between 25 km/h and 100 km/h (15 mph and 62 mph) throughout the Relearn process.
Wait at least 15 minutes before starting a second relearn.
The vehicle’s TPMS light displays with the messages “please check tire pressure” and “low-pressure condition”.
1. Ensure the tires’ air pressure is consistent with the vehicle manufacturers recommended pressure. The vehicle tire placard, located on the door jamb of the driver door, will list the recommended air pressure. Check the tires for wear and leakage. It is best to inflate tires when they are cold.
2. Inflate the tires to 10-15 kPa (1.5 to 2 Psi) above the air pressure recommended on the tire placard. Wait 15 minutes and deflate the tire to the recommended pressure. Never inflate the tire more than 30 percent of its recommended value.
It must be noted that
1) The nominal tire pressure should never exceed the full load pressure, especially vehicles with modified tires; and
2) The vehicle should never be driven with over-inflated tires.
Sensors are properly mounted and have been successfully relearned to the vehicle. The TPMS light displays a few days later indicating “low pressure”. I activated the sensors and the tires read low pressure.
Please double check the valve stems of all sensors to ensure there is no air leak.
Clamp-in sensors are properly mounted, but I have trouble dismounting the tires.
The tire will leak if the washer is not securely mounted against the outer rim. Using the positioning pin, tighten the screw-nut. Do not over tighten.
My tool displays a warning message of “duplicated sensor ID”. I cannot complete the relearn procedure and the TPMS malfunction light remains lit.
The same sensor might have been activated twice and therefore the tool is displaying duplicate IDs.
When activating sensors, follow the procedure displayed on the screen and activate each sensor at the wheel in the order prompted by the display.
Each Sensor on each wheel must have a unique ID. If two sensors display the same ID, you will need to replace the sensor or re-program the MX-Sensor with a unique ID.
I relearned the sensor IDs to my vehicle via the OBD relearn process, but after driving the vehicle for the time and at the speed advised in the relearn procedure, the TPMS light again displays.
Activate the sensors and ensure they are functioning and can be read.
I programmed MX-Sensors via manual input, but after driving, the vehicle’s TPMS light displays.
Ensure that the original sensor ID was correctly inputted.
The tires on my vehicle were rotated, and the TPMS light displays after driving. After inspecting the tires, I found that the front right tire was low, not the front left tire that the vehicle’s dashboard indicated.
The sensors have to be relearned to the vehicle. After the tire rotation, the registered IDs and their corresponding location do not match what is registered to the vehicle’s ECU.
On my Autel TPMS tool, I selected the vehicle model year to activate sensors. Both 315MHz and 433MHz frequencies are available. Which option should I choose?
Some vehicle manufacturers use both 315MHz and 433/434MHz sensors in the same model year. For example, Audi used either 315MHz or 433MHz frequency sensors on their 2005 and 2007 model year A6 vehicles. Select one frequency and attempt to activate. If the sensor fails to activate, choose the other frequency and attempt sensor activation.
“Not supported” or “fail to establish communication” warning messages display.
Contact Autel Technical Support.
I could not find the model year of my vehicle listed on the tool, so I selected a model year close to that of my vehicle. I programmed an Autel MX-Sensors to replace a broken sensor and attempted to activate the sensor as part of the described Relearn procedure, but I cannot relearn the sensor.
If your vehicle model is not supported on your Autel tool, please contact support for a suitable vehicle model year, if available.
I cannot activate TPMS sensors.
1. Ensure your tool has the latest software.
2. Ensure that the vehicle uses Direct TPMS.
3. Make sure you have selected the right model year
4. If more than one frequency type is listed for the vehicle, try both listings.
5. The sensor may be damaged or its battery dead. In either case, the sensor will need to be replaced.
6. If your vehicle’s production month is on the border of two model year listings, try both listings.
7. A vehicle manufacturer might use different sensor manufacturers on the same model during the same production time, such as in this example, BMW 2 Series (VDO) 2014/03-2016/12 433MHz and BMW 2 Series (HUF) 2014/01-2014/12 433MHz. You may need to try both listings.
I can activate sensors but cannot relearn the sensors to the vehicle.
1. Autel’s TPMS tools display manufacturer vehicle relearn instructions. They must be followed exactly for the sensors to be relearned correctly to that vehicle.
2. Hyundai and Kia vehicles can use either high line or low line TPMS systems. Ensure you have selected the correct listing on the tool.
The Autel tool does not read tire pressure information on my vehicle.
Ensure that your vehicle employs a direct system with sensors to monitor tire pressure. If you are unable to verify if your vehicle uses a direct or indirect system, dismount tire, squeeze or separate its outer tube to see if a sensor is attached to the valve stem. Indirect systems do not use sensors on the wheels to measure tire pressure, but rather typically use the antilock braking system (ABS) speed sensors to calculate pressure.
I cannot establish communication between my TS601 tool and vehicle via the OBD port.
If the vehicle uses an Indirect Tire Pressure Monitoring System, the TS601 will not be able to communicate with the vehicle via the OBD port. If available, use one of Autel’s fully bi-directional diagnostic tool such as the MS906 or MS906TS to auto scan the vehicle and confirm the vehicle has a TPMS module. The tire pressure monitoring system can also be managed by the Body Control module. If one of these modules is present, contact Autel Technical Support to ensure the tool and its associated cable is functioning correctly.
The vehicle coverage chart on the website lists that the tool is compatible with my vehicle, but I don’t see it on the tool.
Ensure that your tool has the latest software. If you are unsure how to update your tool, visit the support pages of our TPMS website, www.maxitpms.com
Q: How do I use Autel TPMS tools to change the tire pressure placard value?
1. The TS608, TS508 and TS601 can reset tire pressure threshold. However, the ability to perform this function is dependent on the vehicle. Not all vehicles support this function.
2. Brief instructions follow to perform threshold change with each TPMS tools
• TS508: Select Advanced Mode, and then select vehicle make/model and year. The Tire Type/Pressure Selection function will display if compatible with the vehicle. Select this function and follow the on-screen instructions to alter threshold value.
• TS601: Select vehicle make/model and year. Select Diagnostics. The Tire Type/Pressure Selection function will display if compatible with the vehicle. Select this function and follow the on-screen instructions to alter threshold value.
• TS608: Select vehicle make/model and year. Select Diagnostics tab. The Tire Type/Pressure Selection function will display if compatible with the vehicle. Select this function and follow the on-screen instructions to alter threshold value.
Q: Why and when would a technician want to alter the tire pressure threshold value?
A technician might have to reset the threshold value if the value had been accidently altered or if new tires with lower recommended air pressure than the previous tires have been installed. Failure to set to the new threshold value to the vehicle’s TPMS module will prompt the vehicle TPMS malfunction light to display as the system is reading low pressure.
Q: What’s the tire pressure placard and where is it located?
The tire pressure placard is usually located on the door jamb of the vehicle’s driver side door. The placard lists the manufacturer’s recommended tire size and air pressure for the vehicle.
1. The tire pressure will vary with temperature by about 1 PSI (0.07 bar) for every 12°F (7°C). This means that when the outside temperature decreases, the tire pressure will decrease. Tire pressure should always be set based on cold inflation tire pressure.
2. A tire “naturally” loses about 2.9 PSI every 3 months.
3. An underinflated or overinflated tire is not only dangerous because its blowout risk, but because the vheicl was designed with a specific operating tire pressure in mind. Underinflated or overinflated tires increases instability, reduces traction and increases tire wear.
Some manufacturers ship their TPMS sensors in Ship Mode.
1) Autel sensors have no Ship mode. Program the MX-Sensor for the vehicle, install, activate and relearn.
2) Siemens OE sensor may display “Ship” mode when activated. To enable this sensor, tap the Tool Kit on your Autel TS608 tool and follow the instructions displayed (Currently, this function is only supported on the TS608 tablet);
3) OE sensor might display “Test”, “Park” or “Drive” modes, when activated. These modes do not affect the sensors operation. Ignore message and continue diagnosis and/or relearn as needed.
A “multi-sensor” error means there is one or more sensors too close to the one you are attempting to program. Unless you have selected the Multi-Sensor programming method and are programming multiple sensors at one time, only one sensor should be close to the Autel TPM tool at a time.
The tool may display “NA” for certain sensor and tire parameters after the sensors have been activated, for example:
• Temp (Temperature) displays “NA”, and/or
• BAT (Battery) displays “NA”, and/or
• Mode displays “NA”.
The ability to display information for these parameters is dependent upon the vehicle. Not every vehicle supports displaying Temp, Battery or Mode.
About 10% vehicles, temperature displays NA because the original sensors do not provide the temperature information. About 27% vehicles, battery displays NA because the original sensors do not provide battery level information. The vehicles with NA battery display are mainly GM (50%), Japanese vehicles (25%), Chrysler (5%), Citroen/Peugeot (2.55%), Ford (2.24%) and Volvo (2.24%) earlier than 2014.
To locate and solve TPMS issues, you need to complete the following steps:
1) Use an Autel tool to activate sensors, read accompanying tire and sensor information and scan for trouble codes;
2) Depending on the detected TPMS code, repair or replace the damaged part/s. Codes may reference a faulty TPMS module, receiver, actuator, tire pressure sensor or circuit;
3) Clear trouble codes;
4) Relearn sensors after clearing codes;
5) Switch the ignition off and on again, start the engine, use the tool to scan the TPMS system to ensure the codes have been cleared and the TPMS light is off;
6) Drive your vehicle for 15 minutes to make sure the light does not display again.
Q: What is the difference between high-line and low-line TPMS?
High Line: vehicles with high line systems display the location of the specific underinflated tire as well as the tire pressure for all tires.
Low Line: vehicles with low line systems will not indicate the location of the underinflated wheel tire, and usually only display the TPMS warning light indicating the one or more of the tires is underinflated by 25%.
1) If the sensor is an OEM sensor, follow the Relearn Procedure displayed on the Autel TPMS tools.
2) If the sensor is an Autel sensor, program the sensor, then select Relearn Procedure and follow the instructions displayed.
• To avoid having to relearn TPMS sensor, program the MX-Sensor using the “Copy by Activation” method or the “Copy by OBD” method or the “Manual Input” method.
• Copy by Activation: activate all tire pressure sensors, select “Copy by Activation”, and then select the wheel where the new sensor will be. The sensor ID of the existing sensor (read by activation) is programmed to the new Autel sensor.
• Copy by OBD: connect the tool to the OBD port on the vehicle and read the sensor IDs, select “Copy by OBD”, and select the wheel location for the new sensor. This method reads the TPMS module and programs the registered sensor ID for the wheel to the new Autel sensor.
• Copy by Manual Input: Select the Copy by Manual Input program method and enter the TPMS sensor ID imprinted on the sensor. Ensure that the correct ID setting has been selected, Hexadecimal or Decimal. Hexadecimal IDs contain letters and numbers.
Q: What does it mean to Relearn a TPMS Sensor? When Does it Need to be Done? And How Do I Do It?
Each wheel’s TPMS sensor has a unique ID. That sensor ID and associated wheel is registered in the vehicle’s TPMS module. When a sensor is replaced or when the tires are rotated, the new sensor ID or the new sensor ID for that wheel location on the vehicle, needs to be registered or relearned to the vehicle’s TPMS module.
There are three methods of Relearning TPMS Sensors:
1. Auto Relearn: Driving the vehicle for a specific time and speed.
2. OBD Relearn: Requires a TPMS tool be attached to the vehicle’s OBD port to write (Relearn) the sensor IDs to the vehicle’s ECU. This procedure is frequently used on most Japanese- and Korean-made vehicles, and Chrysler, Fiat, Land Rover and Jaguar vehicles.
3. Stationary Relearn: New sensor IDs are relearned to the vehicle without the need to drive the vehicle or write the IDs to the vehicle’s TPMS module. This relearn procedure should be done in the vehicle’s park mode. This procedure is more frequently used on GM, Ford, some Chinese- and Japanese-made vehicles such as Nissan.
To access the stationary relearn mode, you need to:
1) Use the Autel TPMS tool’s OBD function to enable the Training or Relearn mode; and/or
2) Operate onboard keys as instructed by your Autel tool. After that, you need to activate all tire pressure sensors to complete the Stationary relearn. Generally, the activation sequence is clockwise, starting from the front left wheel and ending with the rear left wheel.
Q: How many types of TPMS relearns are there? And what are they?
There are three basic TPMS sensor relearn methods.
Auto Relearn
Driving the vehicle is required to relearn new sensor IDs, but the vehicle manufacturer may require additional reset steps be taken prior to driving the vehicle. Autel’s TPMS tools display manufacturer-specific Relearn instructions for every TPMS-equipped vehicle. Auto Relearn is frequently used on Chrysler, Fiat, VW, Porsche, Bentley, Benz, BMW, Audi, Land Rover and Jaguar vehicles.
OBD Relearn
An OBD Relearn requires the use of a TPMS tool to write sensor IDs directly to the vehicle’s ECU. This procedure is frequently used on Japanese- and Korean-made vehicles, and Chrysler, Fiat, Land Rover and Jaguar vehicles.
Stationary Relearn
New sensor IDs are relearned to the vehicle without the need to write the IDs to the vehicle’s ECU or without the need to drive it. Stationary Relearn should be done with the vehicle in Park. This procedure is more frequently used on GM, Ford, some Chinese- and Japanese-made vehicles such as Nissan.
To access the Stationary Relearn mode, you need to:
1) Use the Autel TPMS tool’s OBD function to enable the Training or Relearn mode (this function is supported by the TS508 and TS608); and/or
2) Operate the necessary onboard keys as detailed in the Relearn Procedure instructions displayed on your Autel tool.
Next, activate all tire pressure sensors to complete the stationary relearn. Generally, the activation sequence is clockwise, starting from front left wheel and ending with rear left wheel.
Activating a sensor forces it to transmit tire pressure and temperature and sensor ID and battery status to the vehicle. Autel’s TPMS tools can activate sensors and display tire and sensor information.
OEM sensors can be activated by
1) An Autel TPMS tool; or often with
2) Rapid inflation/deflation of the tire (5 PSI or 20 kPa in 10 seconds)
3) OEM sensors on 2003 and older vehicles, may be activated when a magnet is placed over the sensor valve stem.
All Autel MX-Sensors support these methods of activation.
All Autel’s TPMS tools can activate and read information from all current TPMS sensor frequencies: 315MHz, 433MHz and 434MHz TPMS sensors. If the sensor on the vehicle is labeled as 434 MHz, select the 433MHz listing on the TPMS tool.
Autel’s 1-Sensor can be programmed to replace 433MHz, 434MHz or 315MHz sensors. Previous MX-Sensors were available in either 315MHz or 433MHz.
Simply put, if your shop doesn’t do TPMS servicing, you are missing out on a significant revenue stream. Since 2007 all passenger vehicles in the United States have been required to have TPMS systems. Some higher-end vehicles adopted TPMS much earlier, Porsche, for example, in 1986. Most of these systems use battery-powered sensors and those original sensors batteries have an average life of seven years and cannot be replaced. As these sensors die and trip the TPMS light on dashes of vehicles throughout the country, customers will be bringing their vehicles into their local repair shops to have these sensors replaced.
TPMS tools can be used to:
• Check if sensors are still functioning by attempting to activate them, read a tire’s air pressure and temperature and display the sensor’s battery life and ID.
• Display manufacturer-specific Relearns for all TPMS-enabled vehicles.
• TPMS tools with OBDII-connection capability can perform sensor IDs/position Relearns. Nearly 30% of the vehicles on the road today, require such a tool for relearning TPMS sensor IDs to the TPMS module.
• Autel’s TS508 and TS608 can not only perform OBDII relearns but also can diagnose the tire pressure monitoring systems to determine faults and prompts the user what the next step is towards repair.
• All of Autel’s TPMS tools can program MX-Sensors to replace existing sensors on 98 percent of domestic, Asian and European TPMS-equipped vehicles.
Q: What types of TPMS sensors can be replaced by Autel sensors?
Autel MX-Sensors can replace direct TPMS sensors fitted on wheels, including original equipment (OE) and programmable universal sensors. Our MX-Sensors can be programmed to replaced 98 percent of the sensors on vehicles today.
Autel sensors are designed to be used on passenger vehicles, pickups and light commercial vehicles. At this time, MX-Sensors are not compatible with heavy-duty trucks.
A TPMS warning light might display if:
1. The tire pressure on one or more tires is too high or too low. A variation of 25% from the recommended air pressure will cause a malfunction light;
2. One or more of the TPMS sensors may be broken or sensor batteries may be dead;
3. TPMS receivers may not be able to receive sensor signals;
4. The TPMS module may not be functioning
Compared to the Indirect system, Direct TPMS provides a more accurate and immediate pressure, temperature and battery status.
Consult your Autel tool. Select the vehicle Make, Model and Year. The tool will note if the vehicle’s tire pressure monitoring system is an Indirect (no TPMS sensors) system. Direct TPMS sensors are fitted with either rubber or metal valve stems.
Direct TPMS uses direct tire pressure sensors on each wheel to measure tire pressure while indirect TPMS does not use sensors. Indirect TPMS frequently use the anti-lock brake system (ABS) speed sensors to calculate pressure.
The TPMS (Tire Pressure Monitoring System) is designed to measure air pressure and alert the driver when the pressure in one or more of the tires is below 25% of the manufacturer’s recommended pressure. There are two types of systems, direct and indirect. The far more utilized and more accurate Direct System uses sensors that are attached to each wheel. These sensors communicate with the vehicle’s TPMS module. The Indirect System typically utilizes the vehicles antilock braking system’s (ABS) speed sensors to monitor pressure.
Q: Can I activate multiple tool ADAS applications from one calibration frame?
a. No, the activation “bonding” is unique to a single ADAS application tool from the Autel ADAS calibration frame.
b. You can use an “activated” ADAS application tool with any Autel ADAS calibration frame.
For more information, see 'ADAS Frame Banding' on the DOWNLOAD page.
Q: What are the different types of ADAS calibrations and are they brand specific?
Depending on vehicle type, either a Stationary or Dynamic calibration procedure is required (in some vehicle types both are required) to calibrate ADAS sensors to vehicle modules.
• Stationary calibrations are completed in a shop environment and requires the use of targets or patterns to complete.
• Dynamic calibrations require the vehicle to be driven on roadways for a certain amount of time with well-maintained road markings.
a. No obstructions or 2 post lifts. An alignment bay will work if there is approx. 9 1/2’ between the frame and lift
b. Level floor in the bay or the lift being level at 3 foot or lower.
c. No “checker board” or other geometric patterns on the walls or floor
d. Able to close bay door and or block exterior light sources that cast uneven surface shadows
a. Insurance companies are typically paying between $200 and $300 for each ADAS calibration.
b. The ADAS application also provides the Pre and Post-SCAN features, which insurance companies pay $100-$150 for.
Q: Are training options necessary for working on ADAS calibrations?
a. No, The MSADAS software features step by step illustrated instructions for placing the calibration frame and targets.
b. If a customer requests general ADAS training, I-CAR, CTI, and AutoTech have ADAS classes utilizing the Autel tool.
Q: Do I need someone to assemble and or set up the calibration frame?
a. No, the complete assembly is a simple 20-25 minute process. Graphic instruction and standard screws are included.
a. LDW, LKA, ACC (forward looking only) - You need the LDW kit (ADS-LDWPACKAGE)
b. AVM, RCW, RCA (around view / 360 view / rear looking) - You need the Complete Kit (ADS-ADASCOMPLETE)
c. Night Vision, Radar (includes Blind Spot etc.) - Also in the Complete Kit (ADS-ADASCOMPLETE)
*can be added as additional accessories to the LDW kit
Q: If I want to add individual targets or calibration tools later, are they available for purchase?
a. Yes, the specialty fixtures, existing targets and new vehicle coverage targets are available for individual purchase.
a. No, the MaxiSys ADAS application requires a code (QR code scan) from the calibration frame to activate the software.
For more information, see 'ADAS Frame Banding' on the DOWNLOAD page.
a. You can purchase an ADAS UPGRADE to add ADAS capabilities to your existing Autel MaxiSys scan tool.
b. If you do not have an Autel scan tool, then you should purchase an MSADAS scan tool package for best value.
Q: Does the MSADAS tablet provide other scan tool functions other than ADAS calibration?
a. Yes, the MSADAS provides all the same diagnostic and maintence services as the MS908SP, including Pre / Post Scanning
Q: How do I know what patterns and calibration procedures to use?
The Autel MaxiSys ADAS Calibration Application software provides graphic step-by-step instructions that are vehicle model specific to confirm the correct patterns are used during the correct calibration procedures. Your MaxiSys software confirms this information is correct, based on the vehicle information confirmed from the AutoSCAN feature, to confirm which active ADAS modules in any vehicle system may need a calibration procedure completed.
Q: What vehicle preparation is required before performing calibration procedures?
• The vehicle coolants and engine oil should be at recommended levels and the gas tank full.
• The vehicle should not be carrying any load (passengers or cargo).
• Adjust the tire pressure to the recommended value.
• Attach the wireless VCI to the vehicle DLC.
• Make sure the MaxiSys is paired to the VCI, then make sure to close all the vehicle doors.
• Establish communication from the diagnostic tool to the vehicle.
• Follow the MaxiSys ADAS software instructions to ensure accurate calibration. Preparation measures vary by vehicle and system.
Q: What are the shop environment requirements for calibration procedures?
• Flat and level surface with enough room around the vehicle to complete calibration procedures. (generally, there should not be objects within the 15 foot by 30 foot calibration area)
• Perform calibration procedures indoors without object obstructions.
• No exterior light sources to cast uneven surface shadows.
• Some procedures require bright background light alignments.
Q: What are the different types of ADAS calibrations and are they brand specific?
Depending on vehicle type, either a Stationary or Dynamic calibration procedure is required (in some vehicle types both are required) to calibrate ADAS sensors to vehicle modules.
• Stationary calibrations are completed in a shop environment and requires the use of targets or patterns to complete.
• Dynamic calibrations require the vehicle to be driven on roadways for a certain amount of time with well maintained road markings.
The technician can review the post-calibration scan to confirm if the module DTC is cleared. The ADAS module calibration will not complete if the calibration steps were not followed correctly.
Q: What is the easiest way to check the vehicle to confirm which ADAS modules are active?
During the Pre-SCAN procedure, the MaxiSys software will scan all modules in all systems and list on a single screen, then provide visual ADAS icons next to the active ADAS modules. This shows technicians which ADAS systems are active and helps prepare a more detailed repair plan which includes the required ADAS calibration procedures after the repairs are complete.
Q: Which vehicle actions require ADAS system diagnostics or ADAS sensor calibration?
Sensor Replacement / Accident Repair / Wheel Alignment / Windshield Replacement / Diagnostic Service
Based on the powerful MaxiSys platform, Autel presents the MaxiSys ADAS. The MaxiSys ADAS not only provides the original complete diagnostic functionality but also offers comprehensive and precise ADAS calibration.
Combined with the best possible OE-level diagnostic coverage, the MaxiSys tablet has evolved far beyond our original tool capabilities to offer complete ADAS and diagnostic solutions for smarter repair and calibration.
A: Comprehensive Functionality
1.The MaxiSys ADAS offers all diagnostic and maintenance services of the MaxiSys tool.
2.The MaxiSys ADAS’s ADAS module covers many vehicle makes, including Benz, BMW, Audi, VW,
Porsche,Infiniti, Lexus, GM, Ford, Volvo, Toyota, Nissan, Honda, Hyundai and Kia.
3.The MaxiSys ADAS supports the calibration of multiple driver assistant systems, including Adaptive Cruise
Control (ACC), Night Vision System (NVS), Lane Departure Warning (LDW), Blind Spot Detection (BSD),
Around View Monitoring (AVM), Rear Collision Warning (RCW) and Heads-up Displays (HUD).
4.The MaxiSys ADAS supplies graphic illustrations and step-by step instructions.
5.The MaxiSys ADAS provides demos to guide the technician through the calibration.
B: Complete Tools
While the calibration procedures vary by make and the tools differ by driver assistant system, the MaxiSys ADAS calibration toolset can fulfil the flexible installation and precise calibration for a wide range of vehicle makes and systems.
1.The calibration toolset allows flexible assembly for different driver assistant systems and vehicle models.
2.The calibration frame is equipped with a sliding board for easy movement and positioning.
3.The toolset provides calibrations with millimeter accuracy via the precise marks on rulers and
the laser positioning.
Park the vehicle on a flat and level surface with its front wheels pointing straight and ensure there is room around the vehicle (generally there should not be objects within three meters or ten feet of the front of the vehicle).
1.Perform calibration procedures indoors without object obstructions
2.No exterior light sources to cast uneven surface shadows
3.Some procedures require bright background light alignments
The MaxiSys ADAS currently supports calibrations for most today’s ADAS-enabled vehicles in the USA, Asian, European markets.
ADAS calibration procedures should be performed on a level floor. If an alignment lift is used for leveling, the Autel calibration software can provide adjustment information and the calibration frame can be easily raised or lowered to be level with the vehicle.
Q: What are the technology tools of ADAS and where are they in my vehicle?
Cameras, sensors, ultrasound, radar and LIDAR are some of the systems used to capture the driving environment data, including travelling or static vehicles position, pedestrian location, road sign, driving lane and intersection detection, road (curves) and driving conditions (poor visibility or evening driving), use that information to instruct the vehicle to take its predetermined action. Cameras, sensors and sensing systems are typically location in front and rear bumpers, windshield, front grill and side and rear view mirrors.
To get the valuable ADAS calibration software, you can purchase the MaxiSys ADAS tablet or purchase the ADAS calibration software upgrade for your existing MaxiSys tablet.
ADAS radar sensors detect fixed and moving objects at different distances around the perimeter of a vehicle. Different Radar types and frequencies are used in various ADAS systems. Ultra short-range radar (USRR) and short-range radar (SRR) provide data for blind-spot detection (BSD) and lane-change assist (LCA), while systems including adaptive cruise control (ACC) use longer range radar.
The 360° or Surround View Camera System uses multiple camera views to create one 360° top-down (bird’s eye) view surrounding the vehicle. This system is used in both passive (displayed instructions) and active (autonomous) vehicle parking assist systems.
The front-view camera captures what is in front of the vehicle. It is used in a number of ADAS systems, including Lane Departure Warning (LDW), Lane Keeping Assist (LKA) and Traffic Sign/Signal Recognition (TSR) systems, often in conjunction with other sensors, cameras or sensing systems to provide input data.
Perform the following steps prior to setting-up calibration toolset.
1.Park the vehicle on a flat and level surface with its front wheels pointing straight and ensure there are no objects
in front of the vehicle.
2.The vehicle’s coolants and engine oil should be at recommended levels and the gas tank full. The vehicle should
not be carrying any load (passengers or cargo).
3.Attach the VCI to the vehicle and connect the diagnostic tool to the vehicle (if connected through cable, please
pass cable through window).
4.Close the vehicle doors.
5..Adjust the tire pressure to the recommended value.
6.The preparation measures vary by vehicle and system. Please follow the instructions on the MaxiSys ADAS
tablet to ensure accurate calibration.
Under normal circumstances, after repair in an accident, calibration of the relevant auxiliary systems need to be performed. When disassembling or reinstalling monitoring components such as cameras, radars, and sensors, replacing the vehicle ECU, or the vehicle height has been changed, auxiliary and other systems need to be calibrated.
For example: ACC calibration needs to be performed in the following cases.
1. Repair or replace the Adaptive Cruise Control (ACC) radar sensor control unit
2. ACC radar sensor deviation angle out of normal range
3. Adjust position of the ACC radar sensor on the vehicle body
4. Repair or replace bumper or radiator grill
5. Adjust chassis
ADAS usually includes Traffic Message Channel (TMC), Intelligent Speed Adaptation (ISA), Vehicular Communication Systems and other driver assistant systems. The specific systems are as follows:
Vehicle Cab:
1) Lane Departure Warning System
2) Lane Keeping Assist
3) Traffic Sign/Signal Recognition
4) Night Vision System
5) Driver Status Monitor
6) Electric Vehicle Warning
7) Hill Descent Control
Front:
1) Parking Assist
2) Adaptive Front/Lighting System
3) Adaptive Cruise Control
4) Pedestrian Detection
5) Emergency Brake
Rear:
1) Reverse Image
2) Parking Assist
3) Rear Collision Warning
Side:
1) Surround View
2) Blind Spot Detection
The Advanced Driver Assistance System (ADAS) uses image processing cameras, radar, light detection and ranging and other sensors to monitor vehicle surroundings and detect potentially dangerous situations. Purpose: to increase safety through advanced situational awareness and reduce collision possibilities.
Sensors used in ADAS include cameras, radars, lasers and ultrasound. They can detect light, heat, pressure and other variables used to monitor the state of vehicle. Usually they locate in the front and rear bumpers, side mirrors, vehicle cab and wind shield glasses.
Q: What information should I provide if an error occurs on the AP200/HT200 code reader?
- Serial number of the device
- Your phone details (brand, model, software version, etc)
- Screenshots or video of the error on the device
If you need to transfer your software, please contact tech support and provide the following:
- Old and New serial number
- Reason of software transfer
Q: Why am I unable to use Paypal or Apple Pay to purchase software/updates directly?
Please contact the dealer you purchased the device from to purchase software/updates directly
Q: Why am I receiving an "Install Failed" error when attempting to download software?
Android: Long hold the app icon, go to app info > storage > Clear cache and try the download again
iOS: Go to Me > Settings > Clear Cache and try the download again
Q: I failed to purchase the software/update, but I received the message "The product has been moved"
Please contact tech support and provide a screenshot of the message received
Q: Why am I receiving an "Acquire Failed" error when I try to log in?
Check if you are able to see "Log in Later" at the bottom right corner of the login screen. If not, please make sure to download MaxiAP200 to your AP200
Q: Why am I receiving the error message "The vehicle does not support current language"?
Please contact tech support and provide your serial number to change the sales contract to all languages
Logs are collected via MaxiTools when the errors which are most likely related to system program issues occurred. Generally these errors occurred before we get access to internal diagnostic function menu or before we started to diagnose the vehicle. For example, when we tap Diagnostic—Benz, but error message “Authorization Check Failed” came up.
Q: Why am I receiving an error message after factory resetting my device?
Generally this issue occurs after a factory reset attempt on a device that is out of subscription.
Go to ES File Explorer > SD Card > Scan > apk_back
Reinstall MaxiDas.apk
If the apk_back folder is not found on the SD card, please upload the data log via MaxiTools and send the MaxiUI version to tech support
If the device has a valid subscription, flash the device with program which will delete all data; If the device is out of subscription, flash the device with program which will not delete all data first; If the device is still stuck, the risk of using flash program will delete all data and flash the device with the program which will delete all data. Contact tech support for flash program
Please check if your device is in black list. If not, please upload logs via MaxiTools for further details
- Check to see if there is a network issue.
- Check if Autel's server Ips are blocked by your internet provider
- Try to connect the device to another wifi connection or your phone's hot spot
Please go to System Settings-Storage, check if internal space is enough;
Please go to System Settings--About tablet, check if MaxiUI version is too low;
If MaxiUI version is too low, you can use OSupdate apk. file (contact support for this file) to update the system version of the device to higher version first;
If internal space is not enough, please uninstall all software first, then download BMW, Benz, Audi one by one first before you download any other software.
If the space is still not enough, you can purchase a designated TF card and download BMW software into this TF Card
※ Only Sandisk TF card of 16G storage, class 10, 80MB/S is compatible with MaxiSys tools;
※ Only BMW can be downloaded into this TF Card;
If MaxiUI version is normal and internal space is enough, please upload data logs via MaxiTools for checking (refer to E. Upload data logs via MaxiTools).
A) "Error Message “Software is not authorized!”
Issue: Whichever software is tapped, you will see this pop-up window with the error message.
Solution:
Go to ES File Explorer--Scan folder, check if there is file “authorization.txt”;
Go to ES File Explorer--Scan—Vehicle, get access to each vehicle folder, check if the file “authorization.txt” is available;
If the “authorization.txt” file is missing in Scan folder, but exists in all other vehicle folders, please try
connect the tablet to computer via USB cable;
turn on USB storage ;
disconnect USB cable;
tap Diagnostics, select any software to check again.
If the above method is not working, you need to renew subscription and download all software again.
B) “Authorization Check Failed! Error Code: 1”
Issue 1:The error message above camp up when you tap specific software, for example, Mini, on the Diagnostic menu;
Solution:
Go to ES File Explorer—Scan—Vehicle, access to the corresponding vehicle folder, for example, Mini, check if the file”authorization.txt” is available there?
If not, please copy an “authorization.txt” file from vehicle folders, BMW, Rolls-Royce and AstonMartin (they must be from the same software pack when you download them) to Mini folder;
*Note:
BMW, Mini, Rolls-Royce and Aston Martin software are from the same software pack when we downloaded them in Update list;
“authorization.txt” file from other vehicle folders rather than BMW, Rolls-Royce and Aston Martin will not be working;
Check if Mini software is back to normal?
If still not working, you need to renew subscription and download the software again.
Issue 2:The error message above camp up when you tap whichever software on the Diagnostic menu
Solution:
Go to ES File Explorer—Scan—Vehicle, access to the corresponding vehicle folders, check if the file “authorizatuion.txt” is available in each folder?
If not, the only solution is to renew subscription and download all software again.
C) “Authorization Check Failed! Error Code: 2”
Issue 1: "Authorization Check Failed! Error Code: 2” indicates Serial Number and Register Password are not matched.
If the device is still in valid subscription,
Go to MaxiSys-Data manager-Apps Uninstall to uninstall all apps;
Run Update and download them back again.
If the device is out of subscription,
Please go to Settings—About, send the screenshot this page to our tech support to show them Serial Number and Register password of your device;
Collect Logs via MaxiTools and upload.
Issue 2: If you saw Error code 2: Serial or password is incorrect, and when you went to About section but found your serial number becameV09G00000131and register password became056947, please follow the below steps:
Turn this tool OFF and wait for 2 minutes, then turn it ON again;
Repeat the above steps for 5 times (at least) and check the serial number on About page again;
If it still shows S/N V09G00000131 and password 056947, contact the selling dealer for repairs.
D) “Authorization Check Failed! Error Code: 3”
Upload data log via MaxiTools;
Send S/N of your device to tech support for help
E) “Authorization Check Failed! Error Code: 4”
Upload data log via MaxiTools;
Send S/N of your device to tech support for help
F) “Authorization Check Failed! Error Code: 5”
Upload data log via MaxiTools;
Send S/N of your device to tech support for help
G) “Authorization Check Failed! Error Code: 8”
Upload data log via MaxiTools;
Send S/N of your device to tech support for help
H) “Authorization Check Failed! Error Code: 9”
Upload data log via MaxiTools;
Send S/N of your device to tech support for help
i) “Authorization Check Failed! Error Code: 10”
Upload data log via MaxiTools;
Send S/N of your device to tech support for help
Q: What should I do if the subscription on my device runs out?
Send us a screenshot of the error message you received
What were you doing on the device prior to the error message popping up
Upload the corresponding data logs via Maxi Tools in this way:
• Reproduce this issue on your device;
• After the same error occurred, go back to Home page;
• Run MaxiTools, click on Start to collect logs;
• After logs are collected, click on Upload;
• Make sure you saw “Upload completed”.
Connect the device to wifi, click on Authorization button to finish authorization;
Or Uninstall software or erase SD card, then download software again to have the issues resolved.
Q: How can I collect and upload data logs using the AP200/HT200?
- You should click the icon (shown in red box at the bottom) to start the log collecting process
- You will see the icon light up after clicked
- If the problem occurred during the diagnostic process, you should click the icon again to end the log collecting process, and then upload
- Please describe the issue in detail when you upload the data logs
After a log is collected, a log file will be automatically created and stored in your device;
You can go to ES File Explorer > Scan > Data logging to find out the corresponding vehicle folder;
You will see log files (generally zip file named by date) that you can emal directly to tech support
Software Issues when using other product models with Data Logging Function:
Q: What should I do when I'm having software issues on my MX/MK, DS808 or MaxiSys tool?
Generally data logs should be collected if you encounter software issues during the diagnostic process below:
- When you are accessing a specific system/all system
- Reading DTCs, clearing DTCs
- Reading or decoding VIN, reading live data
- Performing active tests, special functions or programming/coding, etc
Q: What precautions should I take when I encounter a software issue?
Describe the problems/errors you are encountering in detail
Upload the corresponding data logs (Data log upload instruction: https://youtu.be/kkdSFht6rh4)
Make sure the data logs collected are valid and complete (a valid and complete data log starts from when you entered the diagnosis and ends when the problem you reported occurred
Make sure the data logs collected were uploaded successfully (Tech support can check in a corresponding system)
Provide the serial number of the device to tech support after the data logs are uploaded.
Q: What steps should I take if I encounter a failure to perform a specific function?
Check if all pre-conditions are fully satisfied
Record the diagnostic process in video and send to tech support;
Advise the make, model, year and VIN of the vehicle;
Send the screenshot of About page of your device;
Advise the specific function you were doing;
Advise in details the problems you encountered and what you have done on the vehicle.
Q: Why did I receive a “Linking Error” message when using the OBDII software?
Check if the vehicle being tested is OBDII compliant (EOBD or JOBD is not supported)
Vehicles adopted the OBDII system at different times and in different regions around the world:
- Europe: Adopted OBDII system since 2006
- U.S.A: Adopted OBDII system since 1996
- Asia: Adopted OBDII system since 2009
Check if any other OBDII compliant vehicles (US vehicles, Ford, GM, Chrysler are suggested) are communicating with the scanner or not; If other vehicles are communicating fine, it is most likely that the vehicle you are testing is NOT OBDII compliant
If it is confirmed that the vehicle is OBDII complaint but you are still receiving a linking error, please provide the following details:
- region/country
- screenshot of About information of your device
- VIN of your vehicle to our tech support
Q: Why am I receiving a communication failure with all modules?
Check if the OBDII cable is working. change to another cable to confirm
Check if the OBDII function is communicating properly
Check if there are any issues with the vehicle itself
Check if any other vehicle has the same issue; If all vehicles are not communicating, please try another OBDII cable.
If this is the only vehicle not communicating properly, please check for problems with the vehicle itself
Check if there are any problems, especially connection issues, in this module
Check if there are any related issues/error codes in any other modules; If yes, fx those related errors first
If you are still receiving an error, please record a video of your diagnostic process and provide the details
The TPMS light is lit on the dash of my 2005 vehicle, what should I do?
The tire pressure control module might be faulty. Use an Autel tool with OBDII-connection capability such as the TS508 or TS608 to detect trouble codes within the TPMS module. You may need to repair or replace a part within the system such as a transmitter or receiver.
My vehicle had a collision. Now my TPMS light stays on. What do I do?
The vehicle may have a damaged TPMS module or non-functioning sensors or both. Use an Autel TPMS tool to check the sensors and the control module.
If sensors fail to activate, the sensors need to be replaced. Program Autel’s MX-Sensors to replace sensors. Follow the vehicle manufacturer-specific Relearn procedures displayed on your Autel tool. If the sensors fail to relearn, connect the Autel TPMS to the OBDII port to scan for system faults. You may need to repair or replace a part within the system such as a transmitter or receiver.
I cannot complete the sensor relearn.
Please carefully follow the step-by-step instructions displayed under Relearn Procedure on your Autel tool.
I performed auto relearn and drove the vehicle, but was unsuccessful in relearning IDs.
Drive the vehicle consistently at the speed of between 25 km/h and 100 km/h (15 mph and 62 mph) throughout the Relearn process.
Wait at least 15 minutes before starting a second relearn.
The vehicle’s TPMS light displays with the messages “please check tire pressure” and “low-pressure condition”.
1. Ensure the tires’ air pressure is consistent with the vehicle manufacturers recommended pressure. The vehicle tire placard, located on the door jamb of the driver door, will list the recommended air pressure. Check the tires for wear and leakage. It is best to inflate tires when they are cold.
2. Inflate the tires to 10-15 kPa (1.5 to 2 Psi) above the air pressure recommended on the tire placard. Wait 15 minutes and deflate the tire to the recommended pressure. Never inflate the tire more than 30 percent of its recommended value.
It must be noted that
1) The nominal tire pressure should never exceed the full load pressure, especially vehicles with modified tires; and
2) The vehicle should never be driven with over-inflated tires.
Sensors are properly mounted and have been successfully relearned to the vehicle. The TPMS light displays a few days later indicating “low pressure”. I activated the sensors and the tires read low pressure.
Please double check the valve stems of all sensors to ensure there is no air leak.
Clamp-in sensors are properly mounted, but I have trouble dismounting the tires.
The tire will leak if the washer is not securely mounted against the outer rim. Using the positioning pin, tighten the screw-nut. Do not over tighten.
My tool displays a warning message of “duplicated sensor ID”. I cannot complete the relearn procedure and the TPMS malfunction light remains lit.
The same sensor might have been activated twice and therefore the tool is displaying duplicate IDs.
When activating sensors, follow the procedure displayed on the screen and activate each sensor at the wheel in the order prompted by the display.
Each Sensor on each wheel must have a unique ID. If two sensors display the same ID, you will need to replace the sensor or re-program the MX-Sensor with a unique ID.
I relearned the sensor IDs to my vehicle via the OBD relearn process, but after driving the vehicle for the time and at the speed advised in the relearn procedure, the TPMS light again displays.
Activate the sensors and ensure they are functioning and can be read.
I programmed MX-Sensors via manual input, but after driving, the vehicle’s TPMS light displays.
Ensure that the original sensor ID was correctly inputted.
The tires on my vehicle were rotated, and the TPMS light displays after driving. After inspecting the tires, I found that the front right tire was low, not the front left tire that the vehicle’s dashboard indicated.
The sensors have to be relearned to the vehicle. After the tire rotation, the registered IDs and their corresponding location do not match what is registered to the vehicle’s ECU.
On my Autel TPMS tool, I selected the vehicle model year to activate sensors. Both 315MHz and 433MHz frequencies are available. Which option should I choose?
Some vehicle manufacturers use both 315MHz and 433/434MHz sensors in the same model year. For example, Audi used either 315MHz or 433MHz frequency sensors on their 2005 and 2007 model year A6 vehicles. Select one frequency and attempt to activate. If the sensor fails to activate, choose the other frequency and attempt sensor activation.
“Not supported” or “fail to establish communication” warning messages display.
Contact Autel Technical Support.
I could not find the model year of my vehicle listed on the tool, so I selected a model year close to that of my vehicle. I programmed an Autel MX-Sensors to replace a broken sensor and attempted to activate the sensor as part of the described Relearn procedure, but I cannot relearn the sensor.
If your vehicle model is not supported on your Autel tool, please contact support for a suitable vehicle model year, if available.
I cannot activate TPMS sensors.
1. Ensure your tool has the latest software.
2. Ensure that the vehicle uses Direct TPMS.
3. Make sure you have selected the right model year
4. If more than one frequency type is listed for the vehicle, try both listings.
5. The sensor may be damaged or its battery dead. In either case, the sensor will need to be replaced.
6. If your vehicle’s production month is on the border of two model year listings, try both listings.
7. A vehicle manufacturer might use different sensor manufacturers on the same model during the same production time, such as in this example, BMW 2 Series (VDO) 2014/03-2016/12 433MHz and BMW 2 Series (HUF) 2014/01-2014/12 433MHz. You may need to try both listings.
I can activate sensors but cannot relearn the sensors to the vehicle.
1. Autel’s TPMS tools display manufacturer vehicle relearn instructions. They must be followed exactly for the sensors to be relearned correctly to that vehicle.
2. Hyundai and Kia vehicles can use either high line or low line TPMS systems. Ensure you have selected the correct listing on the tool.
The Autel tool does not read tire pressure information on my vehicle.
Ensure that your vehicle employs a direct system with sensors to monitor tire pressure. If you are unable to verify if your vehicle uses a direct or indirect system, dismount tire, squeeze or separate its outer tube to see if a sensor is attached to the valve stem. Indirect systems do not use sensors on the wheels to measure tire pressure, but rather typically use the antilock braking system (ABS) speed sensors to calculate pressure.
I cannot establish communication between my TS601 tool and vehicle via the OBD port.
If the vehicle uses an Indirect Tire Pressure Monitoring System, the TS601 will not be able to communicate with the vehicle via the OBD port. If available, use one of Autel’s fully bi-directional diagnostic tool such as the MS906 or MS906TS to auto scan the vehicle and confirm the vehicle has a TPMS module. The tire pressure monitoring system can also be managed by the Body Control module. If one of these modules is present, contact Autel Technical Support to ensure the tool and its associated cable is functioning correctly.
The vehicle coverage chart on the website lists that the tool is compatible with my vehicle, but I don’t see it on the tool.
Ensure that your tool has the latest software. If you are unsure how to update your tool, visit the support pages of our TPMS website, www.maxitpms.com
Q: How do I use Autel TPMS tools to change the tire pressure placard value?
1. The TS608, TS508 and TS601 can reset tire pressure threshold. However, the ability to perform this function is dependent on the vehicle. Not all vehicles support this function.
2. Brief instructions follow to perform threshold change with each TPMS tools
• TS508: Select Advanced Mode, and then select vehicle make/model and year. The Tire Type/Pressure Selection function will display if compatible with the vehicle. Select this function and follow the on-screen instructions to alter threshold value.
• TS601: Select vehicle make/model and year. Select Diagnostics. The Tire Type/Pressure Selection function will display if compatible with the vehicle. Select this function and follow the on-screen instructions to alter threshold value.
• TS608: Select vehicle make/model and year. Select Diagnostics tab. The Tire Type/Pressure Selection function will display if compatible with the vehicle. Select this function and follow the on-screen instructions to alter threshold value.
Q: Why and when would a technician want to alter the tire pressure threshold value?
A technician might have to reset the threshold value if the value had been accidently altered or if new tires with lower recommended air pressure than the previous tires have been installed. Failure to set to the new threshold value to the vehicle’s TPMS module will prompt the vehicle TPMS malfunction light to display as the system is reading low pressure.
Q: What’s the tire pressure placard and where is it located?
The tire pressure placard is usually located on the door jamb of the vehicle’s driver side door. The placard lists the manufacturer’s recommended tire size and air pressure for the vehicle.
1. The tire pressure will vary with temperature by about 1 PSI (0.07 bar) for every 12°F (7°C). This means that when the outside temperature decreases, the tire pressure will decrease. Tire pressure should always be set based on cold inflation tire pressure.
2. A tire “naturally” loses about 2.9 PSI every 3 months.
3. An underinflated or overinflated tire is not only dangerous because its blowout risk, but because the vheicl was designed with a specific operating tire pressure in mind. Underinflated or overinflated tires increases instability, reduces traction and increases tire wear.
Some manufacturers ship their TPMS sensors in Ship Mode.
1) Autel sensors have no Ship mode. Program the MX-Sensor for the vehicle, install, activate and relearn.
2) Siemens OE sensor may display “Ship” mode when activated. To enable this sensor, tap the Tool Kit on your Autel TS608 tool and follow the instructions displayed (Currently, this function is only supported on the TS608 tablet);
3) OE sensor might display “Test”, “Park” or “Drive” modes, when activated. These modes do not affect the sensors operation. Ignore message and continue diagnosis and/or relearn as needed.
A “multi-sensor” error means there is one or more sensors too close to the one you are attempting to program. Unless you have selected the Multi-Sensor programming method and are programming multiple sensors at one time, only one sensor should be close to the Autel TPM tool at a time.
The tool may display “NA” for certain sensor and tire parameters after the sensors have been activated, for example:
• Temp (Temperature) displays “NA”, and/or
• BAT (Battery) displays “NA”, and/or
• Mode displays “NA”.
The ability to display information for these parameters is dependent upon the vehicle. Not every vehicle supports displaying Temp, Battery or Mode.
About 10% vehicles, temperature displays NA because the original sensors do not provide the temperature information. About 27% vehicles, battery displays NA because the original sensors do not provide battery level information. The vehicles with NA battery display are mainly GM (50%), Japanese vehicles (25%), Chrysler (5%), Citroen/Peugeot (2.55%), Ford (2.24%) and Volvo (2.24%) earlier than 2014.
To locate and solve TPMS issues, you need to complete the following steps:
1) Use an Autel tool to activate sensors, read accompanying tire and sensor information and scan for trouble codes;
2) Depending on the detected TPMS code, repair or replace the damaged part/s. Codes may reference a faulty TPMS module, receiver, actuator, tire pressure sensor or circuit;
3) Clear trouble codes;
4) Relearn sensors after clearing codes;
5) Switch the ignition off and on again, start the engine, use the tool to scan the TPMS system to ensure the codes have been cleared and the TPMS light is off;
6) Drive your vehicle for 15 minutes to make sure the light does not display again.
Q: What is the difference between high-line and low-line TPMS?
High Line: vehicles with high line systems display the location of the specific underinflated tire as well as the tire pressure for all tires.
Low Line: vehicles with low line systems will not indicate the location of the underinflated wheel tire, and usually only display the TPMS warning light indicating the one or more of the tires is underinflated by 25%.
1) If the sensor is an OEM sensor, follow the Relearn Procedure displayed on the Autel TPMS tools.
2) If the sensor is an Autel sensor, program the sensor, then select Relearn Procedure and follow the instructions displayed.
• To avoid having to relearn TPMS sensor, program the MX-Sensor using the “Copy by Activation” method or the “Copy by OBD” method or the “Manual Input” method.
• Copy by Activation: activate all tire pressure sensors, select “Copy by Activation”, and then select the wheel where the new sensor will be. The sensor ID of the existing sensor (read by activation) is programmed to the new Autel sensor.
• Copy by OBD: connect the tool to the OBD port on the vehicle and read the sensor IDs, select “Copy by OBD”, and select the wheel location for the new sensor. This method reads the TPMS module and programs the registered sensor ID for the wheel to the new Autel sensor.
• Copy by Manual Input: Select the Copy by Manual Input program method and enter the TPMS sensor ID imprinted on the sensor. Ensure that the correct ID setting has been selected, Hexadecimal or Decimal. Hexadecimal IDs contain letters and numbers.
Q: What does it mean to Relearn a TPMS Sensor? When Does it Need to be Done? And How Do I Do It?
Each wheel’s TPMS sensor has a unique ID. That sensor ID and associated wheel is registered in the vehicle’s TPMS module. When a sensor is replaced or when the tires are rotated, the new sensor ID or the new sensor ID for that wheel location on the vehicle, needs to be registered or relearned to the vehicle’s TPMS module.
There are three methods of Relearning TPMS Sensors:
1. Auto Relearn: Driving the vehicle for a specific time and speed.
2. OBD Relearn: Requires a TPMS tool be attached to the vehicle’s OBD port to write (Relearn) the sensor IDs to the vehicle’s ECU. This procedure is frequently used on most Japanese- and Korean-made vehicles, and Chrysler, Fiat, Land Rover and Jaguar vehicles.
3. Stationary Relearn: New sensor IDs are relearned to the vehicle without the need to drive the vehicle or write the IDs to the vehicle’s TPMS module. This relearn procedure should be done in the vehicle’s park mode. This procedure is more frequently used on GM, Ford, some Chinese- and Japanese-made vehicles such as Nissan.
To access the stationary relearn mode, you need to:
1) Use the Autel TPMS tool’s OBD function to enable the Training or Relearn mode; and/or
2) Operate onboard keys as instructed by your Autel tool. After that, you need to activate all tire pressure sensors to complete the Stationary relearn. Generally, the activation sequence is clockwise, starting from the front left wheel and ending with the rear left wheel.
Q: How many types of TPMS relearns are there? And what are they?
There are three basic TPMS sensor relearn methods.
Auto Relearn
Driving the vehicle is required to relearn new sensor IDs, but the vehicle manufacturer may require additional reset steps be taken prior to driving the vehicle. Autel’s TPMS tools display manufacturer-specific Relearn instructions for every TPMS-equipped vehicle. Auto Relearn is frequently used on Chrysler, Fiat, VW, Porsche, Bentley, Benz, BMW, Audi, Land Rover and Jaguar vehicles.
OBD Relearn
An OBD Relearn requires the use of a TPMS tool to write sensor IDs directly to the vehicle’s ECU. This procedure is frequently used on Japanese- and Korean-made vehicles, and Chrysler, Fiat, Land Rover and Jaguar vehicles.
Stationary Relearn
New sensor IDs are relearned to the vehicle without the need to write the IDs to the vehicle’s ECU or without the need to drive it. Stationary Relearn should be done with the vehicle in Park. This procedure is more frequently used on GM, Ford, some Chinese- and Japanese-made vehicles such as Nissan.
To access the Stationary Relearn mode, you need to:
1) Use the Autel TPMS tool’s OBD function to enable the Training or Relearn mode (this function is supported by the TS508 and TS608); and/or
2) Operate the necessary onboard keys as detailed in the Relearn Procedure instructions displayed on your Autel tool.
Next, activate all tire pressure sensors to complete the stationary relearn. Generally, the activation sequence is clockwise, starting from front left wheel and ending with rear left wheel.
Activating a sensor forces it to transmit tire pressure and temperature and sensor ID and battery status to the vehicle. Autel’s TPMS tools can activate sensors and display tire and sensor information.
OEM sensors can be activated by
1) An Autel TPMS tool; or often with
2) Rapid inflation/deflation of the tire (5 PSI or 20 kPa in 10 seconds)
3) OEM sensors on 2003 and older vehicles, may be activated when a magnet is placed over the sensor valve stem.
All Autel MX-Sensors support these methods of activation.
All Autel’s TPMS tools can activate and read information from all current TPMS sensor frequencies: 315MHz, 433MHz and 434MHz TPMS sensors. If the sensor on the vehicle is labeled as 434 MHz, select the 433MHz listing on the TPMS tool.
Autel’s 1-Sensor can be programmed to replace 433MHz, 434MHz or 315MHz sensors. Previous MX-Sensors were available in either 315MHz or 433MHz.
Simply put, if your shop doesn’t do TPMS servicing, you are missing out on a significant revenue stream. Since 2007 all passenger vehicles in the United States have been required to have TPMS systems. Some higher-end vehicles adopted TPMS much earlier, Porsche, for example, in 1986. Most of these systems use battery-powered sensors and those original sensors batteries have an average life of seven years and cannot be replaced. As these sensors die and trip the TPMS light on dashes of vehicles throughout the country, customers will be bringing their vehicles into their local repair shops to have these sensors replaced.
TPMS tools can be used to:
• Check if sensors are still functioning by attempting to activate them, read a tire’s air pressure and temperature and display the sensor’s battery life and ID.
• Display manufacturer-specific Relearns for all TPMS-enabled vehicles.
• TPMS tools with OBDII-connection capability can perform sensor IDs/position Relearns. Nearly 30% of the vehicles on the road today, require such a tool for relearning TPMS sensor IDs to the TPMS module.
• Autel’s TS508 and TS608 can not only perform OBDII relearns but also can diagnose the tire pressure monitoring systems to determine faults and prompts the user what the next step is towards repair.
• All of Autel’s TPMS tools can program MX-Sensors to replace existing sensors on 98 percent of domestic, Asian and European TPMS-equipped vehicles.
Q: What types of TPMS sensors can be replaced by Autel sensors?
Autel MX-Sensors can replace direct TPMS sensors fitted on wheels, including original equipment (OE) and programmable universal sensors. Our MX-Sensors can be programmed to replaced 98 percent of the sensors on vehicles today.
Autel sensors are designed to be used on passenger vehicles, pickups and light commercial vehicles. At this time, MX-Sensors are not compatible with heavy-duty trucks.
A TPMS warning light might display if:
1. The tire pressure on one or more tires is too high or too low. A variation of 25% from the recommended air pressure will cause a malfunction light;
2. One or more of the TPMS sensors may be broken or sensor batteries may be dead;
3. TPMS receivers may not be able to receive sensor signals;
4. The TPMS module may not be functioning
Compared to the Indirect system, Direct TPMS provides a more accurate and immediate pressure, temperature and battery status.
Consult your Autel tool. Select the vehicle Make, Model and Year. The tool will note if the vehicle’s tire pressure monitoring system is an Indirect (no TPMS sensors) system. Direct TPMS sensors are fitted with either rubber or metal valve stems.
Direct TPMS uses direct tire pressure sensors on each wheel to measure tire pressure while indirect TPMS does not use sensors. Indirect TPMS frequently use the anti-lock brake system (ABS) speed sensors to calculate pressure.
The TPMS (Tire Pressure Monitoring System) is designed to measure air pressure and alert the driver when the pressure in one or more of the tires is below 25% of the manufacturer’s recommended pressure. There are two types of systems, direct and indirect. The far more utilized and more accurate Direct System uses sensors that are attached to each wheel. These sensors communicate with the vehicle’s TPMS module. The Indirect System typically utilizes the vehicles antilock braking system’s (ABS) speed sensors to monitor pressure.
Q: Can I activate multiple tool ADAS applications from one calibration frame?
a. No, the activation “bonding” is unique to a single ADAS application tool from the Autel ADAS calibration frame.
b. You can use an “activated” ADAS application tool with any Autel ADAS calibration frame.
For more information, see 'ADAS Frame Banding' on the DOWNLOAD page.
Q: What are the different types of ADAS calibrations and are they brand specific?
Depending on vehicle type, either a Stationary or Dynamic calibration procedure is required (in some vehicle types both are required) to calibrate ADAS sensors to vehicle modules.
• Stationary calibrations are completed in a shop environment and requires the use of targets or patterns to complete.
• Dynamic calibrations require the vehicle to be driven on roadways for a certain amount of time with well-maintained road markings.
a. No obstructions or 2 post lifts. An alignment bay will work if there is approx. 9 1/2’ between the frame and lift
b. Level floor in the bay or the lift being level at 3 foot or lower.
c. No “checker board” or other geometric patterns on the walls or floor
d. Able to close bay door and or block exterior light sources that cast uneven surface shadows
a. Insurance companies are typically paying between $200 and $300 for each ADAS calibration.
b. The ADAS application also provides the Pre and Post-SCAN features, which insurance companies pay $100-$150 for.
Q: Are training options necessary for working on ADAS calibrations?
a. No, The MSADAS software features step by step illustrated instructions for placing the calibration frame and targets.
b. If a customer requests general ADAS training, I-CAR, CTI, and AutoTech have ADAS classes utilizing the Autel tool.
Q: Do I need someone to assemble and or set up the calibration frame?
a. No, the complete assembly is a simple 20-25 minute process. Graphic instruction and standard screws are included.
a. LDW, LKA, ACC (forward looking only) - You need the LDW kit (ADS-LDWPACKAGE)
b. AVM, RCW, RCA (around view / 360 view / rear looking) - You need the Complete Kit (ADS-ADASCOMPLETE)
c. Night Vision, Radar (includes Blind Spot etc.) - Also in the Complete Kit (ADS-ADASCOMPLETE)
*can be added as additional accessories to the LDW kit
Q: If I want to add individual targets or calibration tools later, are they available for purchase?
a. Yes, the specialty fixtures, existing targets and new vehicle coverage targets are available for individual purchase.
a. No, the MaxiSys ADAS application requires a code (QR code scan) from the calibration frame to activate the software.
For more information, see 'ADAS Frame Banding' on the DOWNLOAD page.
a. You can purchase an ADAS UPGRADE to add ADAS capabilities to your existing Autel MaxiSys scan tool.
b. If you do not have an Autel scan tool, then you should purchase an MSADAS scan tool package for best value.
Q: Does the MSADAS tablet provide other scan tool functions other than ADAS calibration?
a. Yes, the MSADAS provides all the same diagnostic and maintence services as the MS908SP, including Pre / Post Scanning
Q: How do I know what patterns and calibration procedures to use?
The Autel MaxiSys ADAS Calibration Application software provides graphic step-by-step instructions that are vehicle model specific to confirm the correct patterns are used during the correct calibration procedures. Your MaxiSys software confirms this information is correct, based on the vehicle information confirmed from the AutoSCAN feature, to confirm which active ADAS modules in any vehicle system may need a calibration procedure completed.
Q: What vehicle preparation is required before performing calibration procedures?
• The vehicle coolants and engine oil should be at recommended levels and the gas tank full.
• The vehicle should not be carrying any load (passengers or cargo).
• Adjust the tire pressure to the recommended value.
• Attach the wireless VCI to the vehicle DLC.
• Make sure the MaxiSys is paired to the VCI, then make sure to close all the vehicle doors.
• Establish communication from the diagnostic tool to the vehicle.
• Follow the MaxiSys ADAS software instructions to ensure accurate calibration. Preparation measures vary by vehicle and system.
Q: What are the shop environment requirements for calibration procedures?
• Flat and level surface with enough room around the vehicle to complete calibration procedures. (generally, there should not be objects within the 15 foot by 30 foot calibration area)
• Perform calibration procedures indoors without object obstructions.
• No exterior light sources to cast uneven surface shadows.
• Some procedures require bright background light alignments.
Q: What are the different types of ADAS calibrations and are they brand specific?
Depending on vehicle type, either a Stationary or Dynamic calibration procedure is required (in some vehicle types both are required) to calibrate ADAS sensors to vehicle modules.
• Stationary calibrations are completed in a shop environment and requires the use of targets or patterns to complete.
• Dynamic calibrations require the vehicle to be driven on roadways for a certain amount of time with well maintained road markings.
The technician can review the post-calibration scan to confirm if the module DTC is cleared. The ADAS module calibration will not complete if the calibration steps were not followed correctly.
Q: What is the easiest way to check the vehicle to confirm which ADAS modules are active?
During the Pre-SCAN procedure, the MaxiSys software will scan all modules in all systems and list on a single screen, then provide visual ADAS icons next to the active ADAS modules. This shows technicians which ADAS systems are active and helps prepare a more detailed repair plan which includes the required ADAS calibration procedures after the repairs are complete.
Q: Which vehicle actions require ADAS system diagnostics or ADAS sensor calibration?
Sensor Replacement / Accident Repair / Wheel Alignment / Windshield Replacement / Diagnostic Service
Based on the powerful MaxiSys platform, Autel presents the MaxiSys ADAS. The MaxiSys ADAS not only provides the original complete diagnostic functionality but also offers comprehensive and precise ADAS calibration.
Combined with the best possible OE-level diagnostic coverage, the MaxiSys tablet has evolved far beyond our original tool capabilities to offer complete ADAS and diagnostic solutions for smarter repair and calibration.
A: Comprehensive Functionality
1.The MaxiSys ADAS offers all diagnostic and maintenance services of the MaxiSys tool.
2.The MaxiSys ADAS’s ADAS module covers many vehicle makes, including Benz, BMW, Audi, VW,
Porsche,Infiniti, Lexus, GM, Ford, Volvo, Toyota, Nissan, Honda, Hyundai and Kia.
3.The MaxiSys ADAS supports the calibration of multiple driver assistant systems, including Adaptive Cruise
Control (ACC), Night Vision System (NVS), Lane Departure Warning (LDW), Blind Spot Detection (BSD),
Around View Monitoring (AVM), Rear Collision Warning (RCW) and Heads-up Displays (HUD).
4.The MaxiSys ADAS supplies graphic illustrations and step-by step instructions.
5.The MaxiSys ADAS provides demos to guide the technician through the calibration.
B: Complete Tools
While the calibration procedures vary by make and the tools differ by driver assistant system, the MaxiSys ADAS calibration toolset can fulfil the flexible installation and precise calibration for a wide range of vehicle makes and systems.
1.The calibration toolset allows flexible assembly for different driver assistant systems and vehicle models.
2.The calibration frame is equipped with a sliding board for easy movement and positioning.
3.The toolset provides calibrations with millimeter accuracy via the precise marks on rulers and
the laser positioning.
Park the vehicle on a flat and level surface with its front wheels pointing straight and ensure there is room around the vehicle (generally there should not be objects within three meters or ten feet of the front of the vehicle).
1.Perform calibration procedures indoors without object obstructions
2.No exterior light sources to cast uneven surface shadows
3.Some procedures require bright background light alignments
The MaxiSys ADAS currently supports calibrations for most today’s ADAS-enabled vehicles in the USA, Asian, European markets.
ADAS calibration procedures should be performed on a level floor. If an alignment lift is used for leveling, the Autel calibration software can provide adjustment information and the calibration frame can be easily raised or lowered to be level with the vehicle.
Q: What are the technology tools of ADAS and where are they in my vehicle?
Cameras, sensors, ultrasound, radar and LIDAR are some of the systems used to capture the driving environment data, including travelling or static vehicles position, pedestrian location, road sign, driving lane and intersection detection, road (curves) and driving conditions (poor visibility or evening driving), use that information to instruct the vehicle to take its predetermined action. Cameras, sensors and sensing systems are typically location in front and rear bumpers, windshield, front grill and side and rear view mirrors.
To get the valuable ADAS calibration software, you can purchase the MaxiSys ADAS tablet or purchase the ADAS calibration software upgrade for your existing MaxiSys tablet.
ADAS radar sensors detect fixed and moving objects at different distances around the perimeter of a vehicle. Different Radar types and frequencies are used in various ADAS systems. Ultra short-range radar (USRR) and short-range radar (SRR) provide data for blind-spot detection (BSD) and lane-change assist (LCA), while systems including adaptive cruise control (ACC) use longer range radar.
The 360° or Surround View Camera System uses multiple camera views to create one 360° top-down (bird’s eye) view surrounding the vehicle. This system is used in both passive (displayed instructions) and active (autonomous) vehicle parking assist systems.
The front-view camera captures what is in front of the vehicle. It is used in a number of ADAS systems, including Lane Departure Warning (LDW), Lane Keeping Assist (LKA) and Traffic Sign/Signal Recognition (TSR) systems, often in conjunction with other sensors, cameras or sensing systems to provide input data.
Perform the following steps prior to setting-up calibration toolset.
1.Park the vehicle on a flat and level surface with its front wheels pointing straight and ensure there are no objects
in front of the vehicle.
2.The vehicle’s coolants and engine oil should be at recommended levels and the gas tank full. The vehicle should
not be carrying any load (passengers or cargo).
3.Attach the VCI to the vehicle and connect the diagnostic tool to the vehicle (if connected through cable, please
pass cable through window).
4.Close the vehicle doors.
5..Adjust the tire pressure to the recommended value.
6.The preparation measures vary by vehicle and system. Please follow the instructions on the MaxiSys ADAS
tablet to ensure accurate calibration.
Under normal circumstances, after repair in an accident, calibration of the relevant auxiliary systems need to be performed. When disassembling or reinstalling monitoring components such as cameras, radars, and sensors, replacing the vehicle ECU, or the vehicle height has been changed, auxiliary and other systems need to be calibrated.
For example: ACC calibration needs to be performed in the following cases.
1. Repair or replace the Adaptive Cruise Control (ACC) radar sensor control unit
2. ACC radar sensor deviation angle out of normal range
3. Adjust position of the ACC radar sensor on the vehicle body
4. Repair or replace bumper or radiator grill
5. Adjust chassis
ADAS usually includes Traffic Message Channel (TMC), Intelligent Speed Adaptation (ISA), Vehicular Communication Systems and other driver assistant systems. The specific systems are as follows:
Vehicle Cab:
1) Lane Departure Warning System
2) Lane Keeping Assist
3) Traffic Sign/Signal Recognition
4) Night Vision System
5) Driver Status Monitor
6) Electric Vehicle Warning
7) Hill Descent Control
Front:
1) Parking Assist
2) Adaptive Front/Lighting System
3) Adaptive Cruise Control
4) Pedestrian Detection
5) Emergency Brake
Rear:
1) Reverse Image
2) Parking Assist
3) Rear Collision Warning
Side:
1) Surround View
2) Blind Spot Detection
The Advanced Driver Assistance System (ADAS) uses image processing cameras, radar, light detection and ranging and other sensors to monitor vehicle surroundings and detect potentially dangerous situations. Purpose: to increase safety through advanced situational awareness and reduce collision possibilities.
Sensors used in ADAS include cameras, radars, lasers and ultrasound. They can detect light, heat, pressure and other variables used to monitor the state of vehicle. Usually they locate in the front and rear bumpers, side mirrors, vehicle cab and wind shield glasses.

Phone: 0086-755-8614 7779 (China)
1-855-288-3587 Mon-Fri, 9am-6pm EST (US)
Email: support@autel.com (China Support)
ussupport@autel.com (US Support)
Career Opportunities: careers@autel.com